Janmashtami celebrations are incomplete for many families without homemade sweets and traditional bhog prepared for Lord Krishna. While sweet shops are filled with colourful mithai during the festive season, many people prefer preparing something fresh at home, especially when they want greater control over the ingredients used.
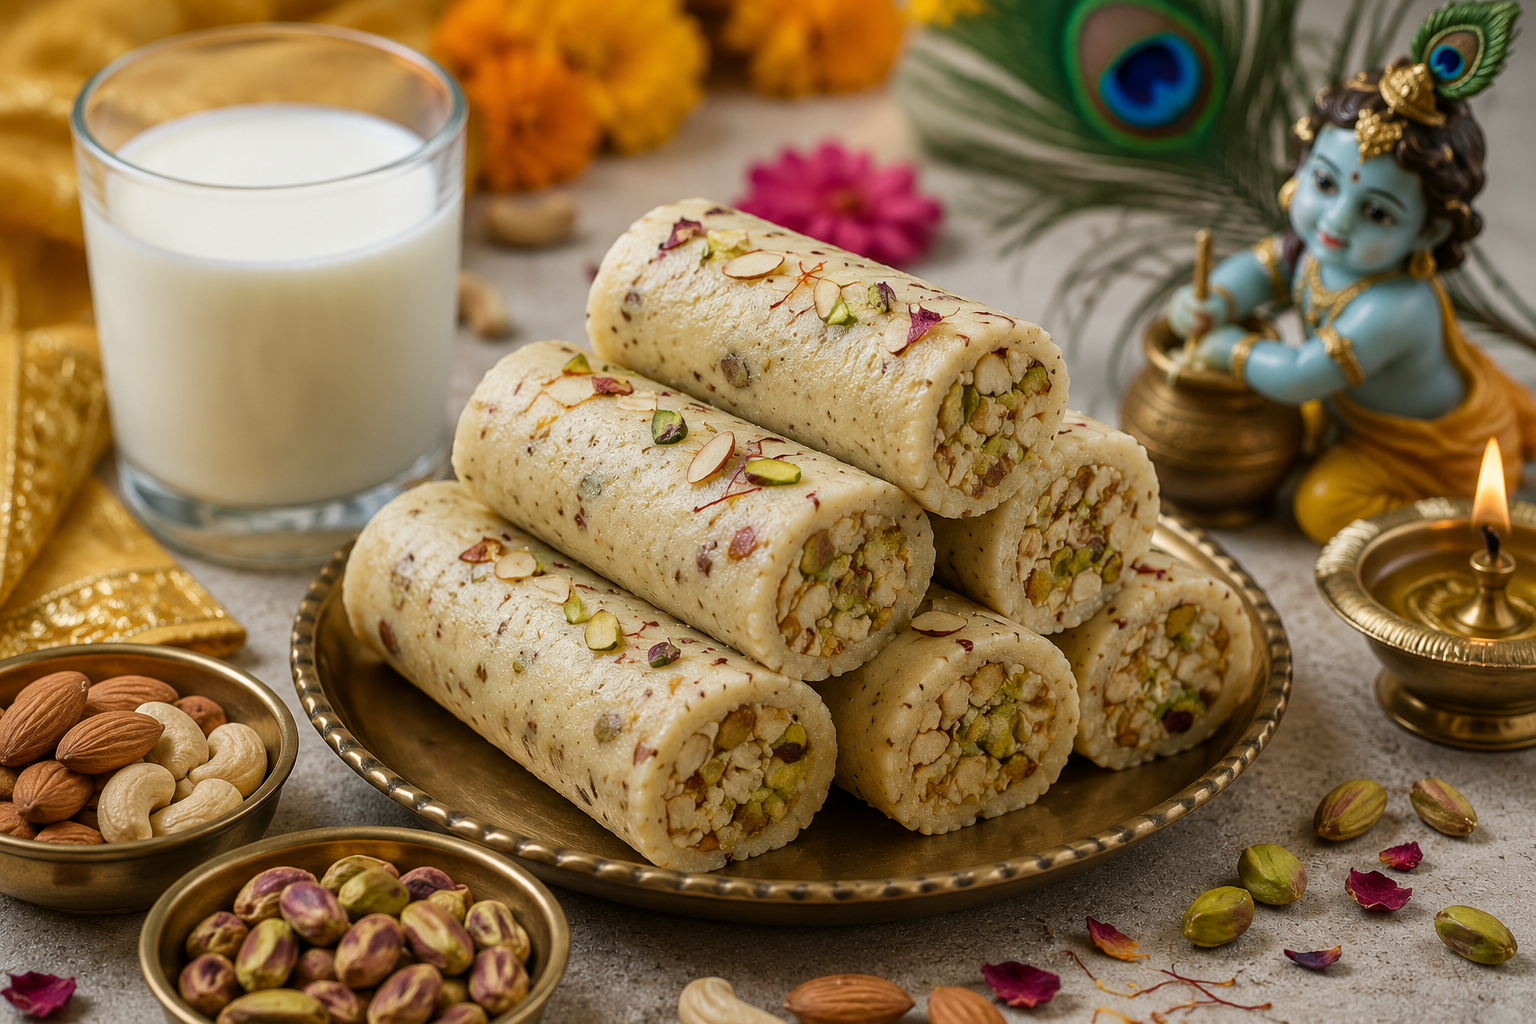
If you are looking for a simple homemade sweet for Janmashtami, Dry Fruit Roll Burfi can be an interesting option. Prepared with milk, nuts and a few commonly available ingredients, this rich sweet can be made at home without relying on ready-made mithai.
Dry fruit rolls sold at sweet shops can sometimes cost around ₹1,000 to ₹1,200 per kg, depending on the ingredients, quality and location. A homemade version can be more economical, particularly if nuts and other ingredients are already available in your kitchen.
The best part is that you do not need complicated equipment or professional sweet-making skills. With one glass of milk and a selection of dry fruits, you can prepare a festive roll that looks attractive enough to serve to guests as well.
Why Make Dry Fruit Roll at Home?
Homemade sweets have a special place in Indian festivals.
Preparing mithai at home allows you to choose the ingredients yourself and adjust sweetness according to your family's preference. You can also decide which nuts to include and avoid ingredients you do not want.
For Janmashtami, many households prefer simple, homemade preparations for bhog and family celebrations.
Dry Fruit Roll Burfi works particularly well because it combines the richness of milk with the crunch and flavour of nuts.
Once prepared, the roll can be sliced into small round pieces, giving it an attractive sweet-shop-style appearance.
Ingredients Needed for Dry Fruit Roll Burfi
You can prepare this festive sweet using easily available ingredients.
For the Milk Layer
- 1 glass full-fat milk
- Milk powder as required
- Sugar according to taste
- A small amount of ghee
- Cardamom powder for flavour
For the Dry Fruit Filling
- Almonds
- Cashews
- Pistachios
- Raisins
- Dates
- A little ghee
You can adjust the quantity and combination of dry fruits according to availability and personal preference.
Dates and raisins provide natural sweetness, while almonds, cashews and pistachios give the roll its characteristic nutty texture.
Step 1: Prepare the Dry Fruits
Begin by collecting the dry fruits you want to use for the filling.
Finely chop almonds, cashews and pistachios. Remove the seeds from the dates, if necessary, and chop them into small pieces.
Raisins can be added whole or chopped depending on the texture you prefer.
Try not to grind all the nuts into a fine powder. Keeping them slightly coarse gives the finished sweet a better bite and makes the filling more interesting.
Step 2: Roast the Nuts Lightly
Place a pan over low to medium heat and add a small quantity of ghee.
Add the chopped almonds, cashews and pistachios and roast them gently for a short time.
The objective is not to make the nuts dark. Light roasting is enough to enhance their aroma and flavour.
Once the nuts become fragrant, add the chopped dates and raisins.
Continue mixing until the dates soften and begin binding the nuts together.
Dates naturally become sticky when heated, which helps create a filling that can hold its shape without requiring a large amount of additional sugar.
Turn off the heat once the mixture comes together and allow it to cool slightly.
Step 3: Make the Milk Base
Now prepare the outer layer of the dry fruit roll.
Take a heavy-bottomed pan and pour in one glass of full-fat milk.
Heat it over a low to medium flame while stirring regularly.
Allow the milk to reduce gradually. Stirring is important because milk can stick to the bottom of the pan and burn if left unattended.
As it begins to thicken, add milk powder gradually.
Do not add too much at once. Mixing it in small quantities can help prevent lumps and make the mixture smoother.
Step 4: Add Sugar and Cardamom
Once the milk mixture becomes thick, add sugar according to taste.
Remember that the dry fruit filling already contains dates and raisins, which provide additional sweetness. Keeping the outer layer moderately sweet can therefore create a more balanced final result.
Add cardamom powder for a traditional mithai aroma.
Continue cooking the mixture over low heat until it becomes thick enough to leave the sides of the pan.
The consistency at this stage is important.
If the mixture remains too soft or watery, forming a roll will be difficult. If it is cooked excessively, the outer layer can become dry and crack while shaping.
Step 5: Allow the Mixture to Cool
Once the milk mixture reaches a dough-like consistency, switch off the heat.
Transfer it to a greased plate or clean surface and allow it to cool until it is comfortable to handle.
Do not attempt to shape the mixture while it is extremely hot.
Once slightly cooled, grease your hands with a tiny amount of ghee and gently knead the mixture until it becomes smooth.
This will form the outer layer of your dry fruit roll.
Step 6: Shape the Dry Fruit Roll
Place the milk mixture on a sheet of parchment paper, butter paper or another clean, lightly greased surface.
Flatten it gently into a rectangular layer.
Take the prepared dry fruit mixture and shape it into a long cylindrical log.
Place this nut-filled log along one edge of the flattened milk layer.
Carefully roll the milk mixture around the dry fruit filling until it is completely covered.
Press gently while rolling so that the sweet holds its shape and there are no large gaps between the filling and outer layer.
Step 7: Give It a Festive Finish
For a more attractive appearance, finely chop some pistachios, almonds or other nuts and spread them over the work surface.
Roll the prepared cylinder over the chopped nuts so they stick to the outside.
This creates the colourful nut-coated appearance commonly seen on dry fruit rolls sold in sweet shops.
You can also use finely chopped pistachios alone if you want a simple green outer garnish.
Avoid pressing too aggressively, as the roll may lose its cylindrical shape.
Step 8: Let the Roll Set Before Cutting
Once the roll is ready, allow it to set.
You can place it in the refrigerator for a short period so that it firms up and becomes easier to slice.
After it has set, use a sharp knife to cut it into small round pieces.
Each slice should reveal the dry fruit centre surrounded by the creamy milk layer.
Arrange the pieces on a serving plate and garnish with additional chopped pistachios if desired.
Tips for Getting the Perfect Texture
The success of this recipe depends largely on consistency.
Use a heavy-bottomed pan when reducing the milk because it lowers the chances of scorching.
Cook on low or medium heat instead of trying to reduce the milk quickly over a high flame.
When adding milk powder, mix continuously to avoid lumps.
The milk mixture should be thick and pliable before you begin shaping it.
If the dry fruit filling feels too loose, add a few more softened dates to help bind the nuts together.
On the other hand, avoid adding excessive ghee, as too much can make the roll greasy and difficult to shape.
Can You Make It Without Too Much Sugar?
Yes. One advantage of making Dry Fruit Roll Burfi at home is that you can control the sweetness.
Dates and raisins already contribute natural sweetness to the centre. You can therefore use a smaller quantity of added sugar in the milk layer if that suits your taste.
However, reducing sugar will change the flavour compared with conventional mithai, so adjust gradually rather than eliminating it entirely unless that is your preference.
How to Store Homemade Dry Fruit Roll
Because this recipe contains milk, storage requires care.
After the sweet has cooled completely, keep it in a clean, airtight container in the refrigerator rather than leaving it at room temperature for an extended period.
Make only as much as your family is likely to consume while it remains fresh.
Always check the smell, appearance and texture before serving stored homemade milk-based sweets.
A Homemade Sweet for Janmashtami Celebrations
Janmashtami is associated with a variety of milk-based foods because of Lord Krishna's traditional connection with milk, butter and curd.
For families preparing festive food at home, a milk-and-dry-fruit roll can add something different to the usual selection of kheer, makhan mishri and traditional burfi.
It can be prepared for family members and guests or included among homemade festive offerings according to household customs.
If preparing food specifically as bhog, follow the ingredients and preparation practices observed in your family or tradition.
Bottom Line
You do not necessarily need to buy expensive sweets from the market to prepare something special for Janmashtami.
With one glass of milk, milk powder, dates, almonds, cashews, pistachios, raisins and a few basic kitchen ingredients, you can make an attractive Dry Fruit Roll Burfi at home.
The process involves preparing a nut-and-date filling, cooking milk into a thick outer layer, rolling the two together and allowing the finished sweet to set before slicing.
Apart from being a festive homemade alternative to market-bought mithai, the recipe gives you greater control over sweetness, ingredients and portion size.
Serve the freshly prepared dry fruit rolls during your Janmashtami celebration, or prepare them as a special homemade sweet whenever you want a rich, nut-filled dessert.